Showing posts with label Sides. Show all posts

Tuesday, November 23, 2010

Go Stuff Yourself


So… I have much to be thankful for this month. One, a new job after five months of searching finally came my way (sigh of relief!). Two, it is sweater weather… and I’m not talking about “it’s foggy outside and I can trick my body into wearing a sweater” weather. I can actually see my breath in the morning. And the scarves… OH, the scarves! I have flung them out of my closet with flourish and have incorporated them into my daily wardrobe seamlessly. It’s as if the weather gods have tired of messing with me and are finally willing to toss me an appropriate weather bone.

Kyle’s halfway done with school, for the second year in a row we have secured our title as owners of the world’s cutest dog and I have wonderful friends, family and my health.

Does one really need a reason to have a seasonally satisfying and soul nourishing meal with the people they love most? Why shouldn't we chow down heartily to celebrate all that is right with the world?


I meant to post this recipe last week with an explanation about how much I used to hate stuffing. I was going to regale you with a description of my mom’s oyster version (sorry to throw you under the bus, Mom, but what kid likes shellfish next to their mashed potatoes and gravy?), as well as how the two of us came by this recipe from this school when we decided to take a mother/daughter cooking class three years ago. We left in agreement that while the instructor’s “Perfect Mashed Potatoes” were anything but, his stuffing was certainly a crowd pleaser and has made it onto our communal table every year since.

Truthfully, I hoped to make this an outstanding post because, for me, this IS one of the ultimate annual holidays and one of the reasons I am happy to be an American (obviously, not the managing to wipe out an entire race of people with sadistic methods and a European epidemic part). Unfortunately, I’m not infallible and I completely dropped the ball; I think the writing is banal and hastily put together at best. Apparently, when one has a lot to be thankful for, time has an easy and somewhat tricky way of getting away from said person. 

Although, would I have it any other way? I don’t think so.

Happy Thanksgiving (and happy eating),
Elizabeth


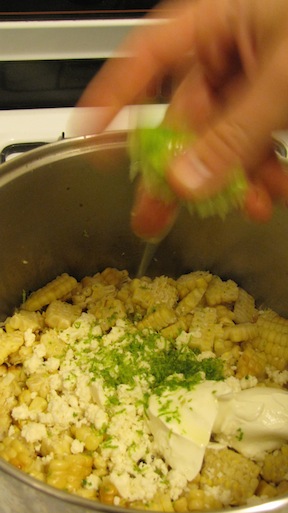
Three Bread Stuffing with Apples, Pecans and Sage Sausage

3 cups French or sourdough bread (no baguettes), cubed in one inch pieces
3 cups corn bread, cubed in one inch pieces
3 cups whole wheat bread, cubed in one inch pieces
1 pound sage sausage (Trader Joe’s makes one now!)
1 white or yellow onion, diced
2 Granny Smith apples, peeled, cored and diced
4 stalks of celery, halved and chopped
½ cup Italian flat parsley, freshly chopped
2 cups chicken broth
4 tablespoons (half a stick) of unsalted butter
½ teaspoon dried oregano
½ teaspoon dried thyme
½ teaspoon crumbly, dried sage
3 large eggs, beaten
2 cups pecans, toasted and chopped

Grease a large Pyrex or metal pan with butter; set aside. Preheat oven to 400 degrees.

Combine three different types of bread (or any combination thereof) in a large mixing bowl. In a large pan, cook sage sausage until there is no more pink visible. Pour on top of bread, add apples and pecans and set aside.


 In the same pan (no need to clean it… the flavor and little meat bits only add to the deliciousness of the stuffing), melt butter on medium heat. Add onions and cook until translucent (about 5 minutes). Add celery and stir for an additional 3-4 minutes. Once that’s done, add the dried oregano, thyme and sage, and chopped parsley; mix well with onions and celery. 


Pour this mixture on top of bread, apples, pecans and sausage. Slowly stir all ingredients in bowl together.

Once done, slowly pour 1 cup chicken broth on top of mixture. Stir well until incorporated, then slowly pour last cup of chicken broth. Pour beaten eggs on top and mix slowly, but well. You want to achieve a consistently moist, but not soggy, mixture.


Pour mixture into greased pan and cover with tinfoil. Put in 400-degree oven for 25 minutes. Remove tinfoil after 25 minutes is up, and let bake for an additional 20 minutes. Serve immediately or keep warm until dinnertime.


Friday, November 12, 2010

Comfort Food 101


This time of year always reminds me of macaroni and cheese.  Some of my earliest memories of the dish are from Halloween, perhaps because it was a special occasion for my brother and me. It was one of the things about the holiday I always looked forward to.  

When you think about comfort food, macaroni and cheese is generally atop most people's lists; it is definitely on the top of mine. I cannot help but order it every time I see it on a menu, if not solely to compare it to the last time I tasted it. This has given me the opportunity to try many varieties, like mac’n’cheese with truffles, as well as a fantastic lobster version (ooo-eee!). Also, it is one of the few things that I could never get sick of; I could eat mac’n’cheese until I felt ill. I believe it is one of the most delicious culinary inventions of all time- have I said enough already?


Surprisingly enough, it is a tricky business to choose the macaroni and cheese recipe that is right for you. I have tried everything from Emeril’s $45 concoction to the $3 boxed Kraft catastrophe. I kept trying recipes, looking for one I loved, and when after months the right one hadn't come along, I had to think back to the roots of the dish. That’s when Paula Dean popped into my head. Her rendition of the classic is simple to execute and has great flavor and creaminess. But best of all, the price is right! As opposed to the über-gourmet recipes that use numerous cheeses, keeping to one keeps the cost down.

I have brought this to a Thanksgiving dinner for 12 people, and I’ve made it for no one but myself. Its irresistibility allows it to fit in anywhere and I have given this recipe to more people than any other in my repertoire. It is my pleasure to share something I feel very strongly about with as many people that care to find out. Most of all, I believe its good for your soul—a true soul food. It leaves you feelings satisfied and warm inside, deeming it the ultimate comfort food.

So if you are looking for something to cook for yourself or your little ones, don't forget about this mac'n'cheesy goodness!

Happy eating,
Lindsay

Mac’n’Cheese
Adapted from Paula Dean's The Lady's Cheesy Mac

2 cups macaroni
2½ cups grated sharp cheddar cheese*
3 eggs, beaten
½ cup sour cream
1 10.75-ounce can condensed cheddar cheese soup
4 tablespoons butter, cut into small pieces
½ teaspoon salt, plus 2 tablespoons for pasta water (optional)
1 cup whole milk
½ teaspoon dry mustard
½ teaspoon pepper
3/4 cup crushed Corn Flakes or Panko

Preheat oven to 350°F. Spray a 13” x 9” glass baking dish with cooking spray. In a large pot, boil 6 cups of water over high heat. Just before adding the macaroni to the pot, add 2 tablespoons of salt to season the water. Add the macaroni and cook so that it has softened but not cooked through, about x-x minutes.** When macaroni is just undercooked, drain into colander.  

When the excess water is drained, return macaroni to pot. Add the eggs, sour cream, soup, butter, salt, milk, mustard and pepper. Stir well and set aside.

Pour macaroni mixture into the baking dish. Sprinkle the crushed Cornflakes or Panko over the top in an even layer.  Bake for 40 minutes, until bubbling and golden brown.

* I use Tillamook extra-sharp cheddar cheese. It can be found at any grocery store and, in terms of flavor, you get the most bang for your buck.
** Cooking pasta so that it is very al dente is very important. Boiling the pasta so that it is fully cooked will produce mushy mac’n’cheese because it cooks more in the oven.  Careful to keep pasta from over-cooking by draining the pasta several minutes before al dente. Then when the pasta is cooked again with the cheese mixture in the oven, it will achieve the perfect noodle texture. 

Tuesday, September 28, 2010

Meet Brett.

Meet Brett.


Aside from being a great friend, he’s a gem in the kitchen and has thus earned the honor of being our first home cook feature.

When Lindsay and I decided we were setting out on our Knife and Fork Adventure, we knew we wanted to celebrate everything having to do with food; not just recipes and restaurants, but also the people who love eating and cooking as much as we do.

Brett’s currently attending law school at Pepperdine University and, luckily for us, moved down the street from Elizabeth and Kyle just a couple months ago. He lives with his life partner, Brittany, who happens to write this blog and co-owns this stationery company (both awesome, by the way).


Presenting Brettany... Cute, right?! 

Their new place is perfect for dinner and dog parties as it has a fabulously large backyard complete with fruit trees and a soon to be developed community vegetable and herb garden. Essentially, we get together, eat some delicious food, drink some delicious wine (or beer) and watch our dogs kind of, sort of play with each other (their dachshunds, Humphrey and Bogart, regulate any sort of merrymaking and Moe happily submits to their demands).
 
 (I pretty much use any excuse I can to post dog photos.)

A couple weeks ago, we had a tasty vegetarian dinner a la Brett featuring roast corn salad, salsamole and curried potato and squash tacos. The salad was his spin on a recipe courtesy of famed chef Bobby Flay, but the tacos and salsamole were all his (and all fantastic!).


He’s a smart, well-spoken guy, so we figured a Q & A session with him about his cooking and recipes could only be a good time. Here’s a brief summary of the things that inspire, excite and have helped Brett progress on his own food adventure. 


Why did you choose to cook the recipes featured?


I chose these recipes for a couple reasons. The squash/potato tacos are a super easy dish, but they're also really unique. I mean, how often do you see curry in Mexican food? And the corn, because, besides just grilling it and eating it straight off the cob, that Bobby Flay preparation is my favorite way to enjoy summer corn. And this was not planned, but I wound up with a vegetarian meal, which we seem to do a lot around our house without meaning to. Maybe next time I'll cook you guys a whole pile of bacon to make up for it.

When did you start becoming interested in cooking? Were there any people or things that inspired you to delve into it?
I think I was always interested in cooking. When I was young I found out the best way to eat what I liked was to cook what I wanted. I used to love making French toast in the morning before school. My mom, because she allowed me to help out in the kitchen. As a little kid I think I learned a lot just from watching her, but also from her allowing me to cook things myself. And I've always thought of her as a great cook.

What is you favorite cusine or type of food to cook?
I don't know if I have a favorite. I have this horrible compulsion, first of all with not reading recipes well, and second, with not wanting to cook the same thing twice. And I think along with that, I am always looking for something new, so I've never sat down to really explore one cuisine. I do love southeast Asian foods, even if what I'm doing is a facsimile and probably a gross misrepresentation of the actual dish, I still find it fun to try.    

Where do you get food inspiration from?
I take some inspiration from blogs, food magazines, but really, I take most of my inspiration from two places. First, and this is for the feel, the aesthetic, the philosophical underpinnings, along with the amazing food, is Anthony Bourdain's show No Reservations. And second, eating out. I love the challenge of recreating a dish I've had somewhere, coming up with my own interpretation of what they've done.

For who do you most like to cook?
I will tell you what I don't like, or who I don't like to cook for: me. I am first of all my own worst critic, and second, I just don't find as much pleasure in dining alone. I think that there's a deep satisfaction from sharing food at a table with someone, and so if I'm by myself I usually just eat some takeout or something. This past summer has been a difficult one in terms of food, as I spent a lot of the time alone on nights where I would usually be cooking for my girlfriend and myself. That being said, in terms of volume I cook most often for my girlfriend, but I love cooking for anyone who appreciates good honest food, good wine, and conversation, because that's what I want out of a meal. I want that communion. That's really why I cook. If you cook like shit, it makes it difficult to convince people to come back and share in that experience again.

What is the most interesting thing you have learned about cooking recently?
Hmm. I don't know. I guess it would be how much more I have to learn, which is good because it means I can never get bored cooking.

Are you self taught or did someone teach you to cook? Any classes?
Self taught. I'm sure it shows in the execution, but I like to think that my taste makes up for it. Besides, I'm never going to be plating haute cuisine, so do I really care if I can't properly julienne a carrot?

What are your favorite food magazines and blogs? Any cookbooks you swear by?
My go-to blog is smitten kitchen. Deb just has impeccable taste; everything she does appeals to me, and I've yet to have a recipe of hers turn out poorly. I get Bon Appetit, and have some Gourmets, and some cookbooks. I like Alice Waters, and Ina [Garten], but because I'm so bad at following recipes, I go long spells without opening the magazines or books.

What are the dishes or ingredients you look forward to most each season?
During the summer, I love stone fruit, berries, corn, and tomatoes. They all stand on their own, and when at their peak they're good enough to eat fresh, but I am a sucker for a nectarine and blackberry crumble, or barbecued corn with a little butter spread on it, and of course, heirloom tomatoes and mozzarella might be one of my favorite meals of all time. And in the fall, apples and pears. They get the same treatment as the nectarines. I combine the two and make a crumble with massive amounts of topping.


Salsamole


4 medium avocados
3 heirloom tomatoes
2 cloves garlic
1/2 bunch cilantro, chopped (the taco recipe uses half a bunch, also)
Juice of 3-4 limes (or to taste)
3 Tablespoons ground cumin (or to taste)
1-2 serrano or jalapeno peppers (optional)
Salt and freshly ground pepper (try white for a subtle twist)


This is almost more of a salsa with the amount of tomato added. Chop your tomatoes, add to a bowl with the lime juice. Split your avocados and add the fruit to the bowl. 


Add your cilantro, garlic, peppers and a generous amount of salt and pepper. Mix, taste, add more salt if needed, and enjoy.


Curried Potato Tacos


1-2 white potatoes
1 squash
1 package mushrooms 
2 cloves garlic, pressed
3 Tablespoons curry powder
1 teaspoon garam masala
1 teaspoon sumac
1 and 1/2 Tablespoons ground cumin
1 bunch cilantro, chopped
Salt and freshly ground pepper


Chop and prepare your potatoes and squash so that they're a little smaller than the mushroom slices (you want the potatoes small enough so that they fully cook in the pan).


Add some olive oil to a large skillet over medium-high heat and add the potatoes. Stir the potatoes and let them cook for a couple minutes by themselves; then, add the squash and spices. Let this cook again for a few minutes, then add in the garlic, mushrooms, and a little more than half of the cilantro (reserve the rest for the salsamole). Add a little more oil if the pan is too dry. 


Cook for an additional 5 to 10 minutes; the dish is ready when the potatoes are tender and ready to be eaten). Salt and pepper to taste. Place mixture in a warm corn tortilla and add your favorite taco accompaniments (Brett served his with grilled onions and queso fresco- cotija cheese works well, too).


Note- Brett uses spicy curry powder, but mild will work fine too.


Grilled Corn Salad with Lime, Red Chili and Cotija
Courtesy of Bobby Flay and Food Network, 2008


8 ears fresh corn, silks removed, husk on, soaked in cold water 30 minutes
Canola oil
Salt and freshly ground pepper
1/4 cup creme fraiche (sour cream is a fine substitute)
2 limes juiced and 1 zested
1 Tablespoon ancho chili powder
1/4 cup chopped fresh cilantro
1/4 cup grated cotija cheese


Heat grill to high. Grill corn until charred on all sides, about 10 minutes. Take off the grill and removed the kernels with a sharp knife. While you are cutting the corn, put a cast iron skillet on the grill to heat.


Add the corn and the remaining ingredients to the hot pan and cook, stirring occasionally, until creamy and heated through. Serve and enjoy.


Monday, July 12, 2010

'Bouleh, 'bouleh!*

My husband accused me of making too much food the other day.  He did it in a way that compared my cooking to the spending habits of Marie Antoinette… Overzealous. 


Apparently when I prepare meals for the two of us, we wind up with enough to feed at least four, sometimes eight additional people.  He then went on to suggest that I start halving recipes in order to keep from wasting food.

Unfortunately, I have a huge problem with this.  See, I cook extra food for one reason and one reason alone: Leftovers.  Personally, I enjoy a sandwich for lunch as much as the next person (although I will mention I am incredibly picky when it comes to the preparation of said sandwiches), but if I had to choose, I’d go with leftover lunches every time.   Do you ever find yourself excited over the possibility of eating last night’s dinner a day or two (or three) later?  It happens to me more often than I'd like to admit.

I will concede he left me feeling guilty about it.  Maybe he doesn’t love leftovers as much as I do.  Perhaps he eats more of them than I ever will (but c’mon people, isn’t this one of the assumed “husband responsibilities?”).  Either way, we are clearly at a standstill in our beliefs.


There is one recipe I will never feel bad about making excessive amounts of and it’s tabbouleh. I have a sneaking suspicion there are one of two things happening in the minds of our readers right now.  One is, “I love tabbouleh!”  The other is, “What’s tabbouleh?”  For those of you who don’t know, I’m about to change your life.

Tabbouleh is a dish that comes to us from our Lebanese brothers and sisters across the Atlantic.  Essentially, it’s a salad made with bulgar wheat, cucumbers, parsley, mint, green onion, and the holy trinity of Mediterranean cooking: olive oil, lemon juice and salt.  Not only is it incredibly easy to make- you feel good, healthy and nourished while eating it, too. 


My husband still manages to complain about leftovers when I make tabbouleh, but it’s usually because I’ve eaten the entire bowl on my own.

Happy Eating,
Elizabeth


Tabbouleh

1 heaping cup bulgar wheat**
1 bunch of parsley
1 bunch of mint
1 bunch of green onions (scraggly ends removed)
1 cucumber, peeled and chopped
Lemon juice  ***
Extra virgin olive oil ***
Salt ***

Pour cup of bulgar wheat into a large bowl.  Pour hot water over the bulgar wheat (at least enough to cover the top of the wheat) and let sit for an hour.  Drain in colander and get as much excess water out of the grain as you can.

Using a food processor (I love this one particularly), blend the parsley, mint and green onions (stems and all) until well chopped (not to the point of green paste, but enough where the bits of herbs are very small).  If you do not have a food processor, a blender will do, however, there will be a considerable amount of scraping down the sides in comparison). 


Combine green mixture with bulgar wheat.  Add lemon juice, olive oil and salt***.  Finally, add cucumber and serve immediately.  Can be stored for up to a week in the fridge, but tastes best eaten fresh.


* I thought I should mention why I chose this particular title for this write-up.  When I was little, my mom made tabbouleh all the time.  Whenever she’d whip up a batch, she’d start singing, “’Bouleh, ‘Bouleh” to the tune of “Wooly Bully,” while moving her arms back and forth like she was doing a fast-paced hula dance. I urge you to do the same.

** Bulgar wheat can be found at most health food stores, and some regular supermarkets.  Look for it in the bulk or grain sections of your favorite grocery.

*** Were you freaking out back there when I didn’t put measurements down for the lemon, olive oil and salt?  That’s because it’s up to you, silly!  I know what you’re thinking… “How will I know what’s enough?!!!!”  Simple: you trust your palate and go slow.  Remember, it’s always easy to add more, but it’s impossible to take flavor out.  I would start by squeezing the juice of one juicy lemon, adding two tablespoons of olive oil, and a hearty pinch of salt (salt is a VERY necessary component of this dish).  Mix it, taste it, then go from there.  

Friday, June 18, 2010

Happy Thomas Keller Day!


Often I let my mind wander decades into the future…  What will I name my first-born? When driving through well-to-do neighborhoods, I see a beautiful home and think to myself, “that will do.”  All of these notions about my future life frequently change.  There is one thing I’m fairly certain of though, and that is that I will retire somewhere in the Napa Valley.

I once overheard someone say that per capita, Napa Valley has the most Michelin stars than any other place in the world… pretty groovy. There are a plethora of tremendous restaurants run by some of the world’s most renowned chefs. But of them all, for me one name in particular stands out above the others: Thomas Keller. 

As E previously mention, I recently had a chance run-in with the guy... and what a gentleman he is!  For someone who has accomplished so much, he was incredibly humble and down-to-earth. Although I received a signed copy of Ad Hoc, I was still bummed I didn't get to meet him in person.  It truly must have been fate that I bumped in to him at The Grand Hotel. I'm pretty sure I blushed and grinned like a school girl when I saw him, but he didn't seem to notice.  He was engaging and lovely. Upon telling him that I recently dined at Ad Hoc, he dove into a series of questions. What did we eat?  Wedge salad, tenderloin of beef, and an espresso panna cotta!  How did we like it?  Everything was perfectly cooked and seasoned... excellent! Was the service up to par?  Above and beyond!

Looking through the Ad Hoc cookbook literally forces you into hunger. The photography is beautiful and showcases each recipe wonderfully. The recipes are approachable and reflect the theme of family and home.  This made it pretty hard to settle on something to cook.  But when I saw the Maine Lobster Rolls, I remembered what my parents said this past fall when they returned from a truly epicurean vacation to New England: one of the best things they ate the whole trip were the lobster rolls. The deal was done; I had to try it. Tommy's version was absolutely delicious. The mayonnaise dressing was cut with lime juice and plenty of herbs, so it was not too heavy. 

Living in California, I quickly realized the New-England-style buns are difficult to find.  I found La Boulange’s brioche hot dog buns, unsliced, at Whole Foods work perfectly for this recipe. If you can’t find them, top slit buns or regular hot dog buns are perfectly acceptable (just make sure to brown the sides).

Another note is the size of the lobster meat: Tommy recommends to leave the chunks of lobster large, ¾ inch or so. This is to appreciate its texture and give a juicy, luxurious feel (which is why I love the guy so much!). For this quantity of lobster meat, you will need five 1 ¼ pound lobsters. Lobsters that have grown too big are not as tender.  Even going to a high-end grocery store, I was unable to find whole Maine lobster. I had to use lobster tails, which I was worried about, but the results were just as great.

Per his suggestion, we made corn on the cob with lime salt to eat with the lobster rolls. The extra lime salt is definitely worth keeping (try it on popcorn!). We enjoyed these in the backyard in the warmth of the early evening sun.  Meeting him or not, I hope your experience with this meal was as good as mine.

Happy eating,
Lindsay


Maine Lobster Rolls
Serves 4 to 6

1 ½ pounds (about 4 cups) cooked lobster
3 to 4 tablespoons mayonnaise
2 tablespoons minced red onion
2 tablespoons finely chopped peeled celery
2 teaspoons finely chopped tarragon
2 teaspoons finely chopped flat-leaf parsley
2 teaspoons finely chopped chives
Kosher salt and fresh ground black pepper
½ lime
6 New England-style (top-split) hot dog buns or other hot dog buns, preferably unsliced
4 tablespoons unsalted butter, melted
1 celery stalk
1 head butter lettuce, leaves separated, rinsed, dried, and torn into pieces
Pickled Red Onions (optional)

Put the lobster meat in a large bowl, add the mayonnaise, and stir gently to coat.  Add the onion, celery, tarragon, parsley, chives, and salt and pepper to taste and stir gently to mix. Squeeze the lime over the salad and fold in the juice. Cover and refrigerate.

If using top-split buns, brush butter on both outer sides of each bun. If using unsliced buns, split them open from the top, then trim each long side to create a flat surface and brush with melted butter. If using regular hot dog buns, open the buns and brush with butter. Heat a frying pan over medium-high heat. Just before serving, put the rolls in the pan and brown the buttered sides.

To serve, peel the strings from the celery with a vegetable peeler. Using a Japanese mandoline or other vegetable slicer, or a sharp knife, slice the celery lengthwise into thin ribbons. Line each bun with a couple of small pieces of lettuce. Mound the lobster salad in the buns and garnish with the celery.

To cook the lobster…

Fill a large pot with water, and bring to a boil. Cook 1 or 2 lobsters at a time. Add the lobsters headfirst and cover the pot to return the liquid to a gentle boil, then remove the lid and boil for 1 minute. Remove the pot from the heat, cover, and let the lobster(s) steep for 10 minutes.

Transfer the lobster(s) to a tray to cool for 15 minutes. Remove the meat from the shells: Working over the tray, twist off and remove the tail from each lobster body. Then twist and pull off each of the claws.

To remove the tail meat…

Hold each tail flat, back shell facing up, and using a sharp chefs knife, cut lengthwise in half.  With a pair of tweezers, pull out and discard the vein that runs the length of the tail.  Cut the tail meat into pieces about ¾” in size.  If there is any roe (bright red coral), it can be finely chopped and added to the lobster salad.

To remove knuckle and claw meat…

Twist off each knuckle from the claw. Hold the claw in your hand and pull down to loosen the lower pincher. Then, push it to either side to crack it and pull it straight off. Still holding the claw, crack the top of the shell with the heel of a knife, about ¾ inch from the joint where the knuckle was attached, and wiggle your knife to loosen and crack open the shell. Shake the claw to remove the meat.

Cut off top joint, the one that was attached to the body, of each knuckle. Use scissors to cut open the shell along the smooth outside edge of each knuckle. Pry open the shell and remove the meat. Cover all lobster meat and refrigerate until completely chilled.

To remove leg meat…

Pull of the legs from the cooked lobster. Cut off the wider end of each leg. Lay the legs down on the counter, with the pincers facing you. Using a rolling pin, roll from the pincers toward the cut end: the pressure will cause a strand of lobster meat, “spaghetti,” to emerge from each leg.

*For more information of the anatomy of a lobster visit this site. The knuckle is the part of the lobster that connects the claw to the body.


Corn on the Cob with Lime Salt
Serves 6

6 ears supersweet white or yellow corn, shucked
6 tablespoons unsalted butter, cut into pieces, at room temperature
Lime Salt (recipe follows)
2 tablespoons finely chopped chives

Cut both ends of each ear of corn, and cut the ears in half.

Bring a large pot of well-seasoned water to a boil. Add the corn and cook for 5 to 7 minutes, or until the corn in tender.

Meanwhile, transfer about 2 tablespoons of cooking water to a large wide heatproof bowl. Add the butter and swirl the bowl over the heat to emulsify. Add the lime salt to taste, swirling the bowl to maintain the heat emulsification. Set aside in a warm spot.

Drain the corn well and add to the butter. Sprinkle in the chives. Swirl the bowl to coat the corn evenly. Sprinkle with additional lime salt, and serve the remaining salt on the side.


Thanks for the Christmas gift E!


Lime Salt
Makes ¼ cup

¼ cup Maldon sea salt or fleur de sel
Grated zest of 1 lime (use a Micropane)

Put the salt and lime zest in a small jar. Put on the lid, and shake to combine.  Extra salt can be stored in the freezer.

Tuesday, May 25, 2010

Israeli Couscous


One of the reasons I love cooking is that bonds can be built when sharing food with someone else. Whenever I meet a fellow food lover, there is an instant connection I feel to that person. This was the case when I began to build a relationship with my sister-in-law seven years ago. Aside from the fact that she would eventually become a member of our family, food was the fundamental building block of our friendship.

Israeli couscous was the first recipe that E shared with me, and as soon as I tried it, I knew she was a cook that spoke my language. This was a dish I loved and could wholly relate to, and it was then that I knew we would cook well in tandem. We’ve modified it through the years, but it remains one of “our dishes.

Week after week I find myself eating the same thing for lunch everyday. This is mostly because it is thrifty to do so, and that has been the name of my game since graduating from college. But I am beginning to wonder how much longer I can handle different variations of the trite turkey sandwich. Couscous is a grain with infinite versatility. This particular recipe has a Mediterranean flavor profile. However depending on the ingredients added, it can wear different ethnic hats any day of the week. Tuscan, Greek, Spanish—you name it! Switching out ingredients for ones you better prefer only makes it tastier. 


That being said, I often use this recipe as inspiration to come up with ideas depending on the ingredients I have on hand. Make a large batch of couscous in the beginning of the week and add ingredients from last night’s dinner to make a lunch entirely different than the day before. If you have leftover salmon or chicken, either would make a hearty addition to this couscous. Also, substituting a dried fruit for the sun dried tomatoes adds a sweetness that balances the tart and salty flavors.


I should mention that in regard to the vegetables and added ingredients, you don't have to be exact in measuring... For each person's preference, the more the merrier, as the case may be!  

Happy eating,
Lindsay

Note: Raised serving plate in top photo by Lisa Neimeth.

Israeli Couscous Salad

2 tablespoons canola oil
1 cup israeli couscous*
2 cups water
1 teaspoon salt
½ cup toasted pine nuts
½ cup artichoke hearts, chopped
½ cup diced cucumber
¼ cup sun dried tomatoes, diced
¼ cup feta cheese
½ cup cilantro, chopped**
1 cup Lemon Vinaigrette (recipes follows)

First, prepare the Lemon Vinaigrette and set aside. Heat oil in a pot over medium-high heat. Add the couscous and toast until brown, about 3 minutes. Add the water and salt to the pot and bring to a boil. Then, turn the heat down and cover. Let simmer for 5 to 7 minutes until the couscous is tender.

Drain in a mesh strainer so the smallest grains do not slip through. Put the couscous into a bowl and immediately pour over the vinaigrette. Make sure you do this when the couscous is still hot so that the grains soak up the vinaigrette. Stir so that the vinaigrette fully coats that couscous, and put in the fridge to cool, about one and a half hours. 


While the couscous is cooling down, prepare the vegetables. Once chilled, add the rest of the ingredients and toss gently. Serve couscous cold.


Lemon Vinaigrette

Juice and zest of 2 lemons
1 teaspoon dijon mustard
1/4 cup olive oil
1 tablespoon honey

Combine all ingredients in the blender, or whisk by hand, until incorporated and thick.


Notes: 
* Israeli couscous can be found at most grocery stores in the grains sections. We prefer the “Harvest Grains Blend” from Trader Joe’s. You end up devouring it with your eyes before it gets to your mouth. The different grain sizes and textures make the couscous more dynamic and interesting. However regular Israeli cousous, aka pearl couscous, is perfectly acceptable.

**I've come to realize that you are either a parsley person or a cilantro person. Being that I am from California, I lean to cilantro. But parsley, or another leafy hearb would be just as great. 

Related Posts Plugin for WordPress, Blogger...