Showing posts with label Appetizers. Show all posts

Thursday, December 16, 2010

Time to Celebrate

You know who loves a party? Knife and Fork loooooves a party, especially those of the holiday variety.  Thus, it would be appropriate to use too much holiday partying as an excuse for our lack of posting in the month of December.

Sadly, this is not the case. We’re working girls and as is common at the close of a year (is it really almost 2011?), we have been busting our booties with the best of them.

This, of course, should not hamper our readers’ ability to host a kick ass holiday party. Granted, Hanukkah’s over by now, so to our Jewish readers, we extend our most sincere מצטער (that’s sorry in Hebrew, by the way), but for everyone else, there’s still the rest of December to think about. Christmas, New Year’s Eve, both hold much promise in the party circuit, but what to make if you’re planning on hosting?

Pancetta Wrapped Prawns with a Pesto Balsamic Glaze

Not to worry friends: we’ve got you covered.

One of the most important things to think about when you’re planning a get together is preparing as much as you can in advance. Nothing spells “bummer of a party” more than a stressed host or hostess slaving away in the kitchen (I’d be lying if I said this has never before happened to me. The thought of Halloween 2009 still makes me break out in a sweat). By writing out your menu and timeline days in advance, not only will you feel in control, you’ll also have a better time at your own gathering as well.

Stuffed Dates

For holiday party drinks, one can never go wrong with champagne, prosecco or sparkling wine. Served in flutes with a few raspberries, cranberries or a touch of pomegranate syrup merely adds to the festive mood. If hard alcohol’s more your thing, you can always serve up a Dark and Stormy with a holiday twist: add seasonal whole spices like cinnamon sticks, cloves, orange peel and star anise to your simple syrup while heating it on the stove. It will infuse traditional flavor to an already wonderful drink. Eggnog with Maker’s Mark and hot apple cider are also excellent go-to winter beverages, and for the beer drinkers, I’ve been spotting some special ales at Trader Joe’s specifically made for the weeks of December.

Pear, Sage and Blue Cheese Crostini

But what to do about food? Hosting a dinner party is only suggested for those planning on inviting less than eight friends. When it comes to a group of ten or more, go with appetizers, some hot, some cold, some room temperature. This will not only help you in determining how much you can cram in the oven, it will also allow you to have much of it done before your guests arrive. And there’s nothing better than looking like a million bucks with everything ready to go once showtime rolls around.

Below are a few tried and true appetizer recipes we’ve had at some of our own gatherings over the years, and I hope they’ll come in handy over the next few weeks.

To all of you, Happy Christmas, Hanukkah and New Year, and happy eating for the rest of 2010.

See you in 2011,

Elizabeth


Pancetta Wrapped Prawns with a Pesto Balsamic Glaze


Slice pancetta slices in half. Lightly fry pancetta on medium-low heat about halfway (i.e. partially cooked, but allowing it to be malleable and move easily). Once brought to room temperature, wrap pancetta around prawn and secure with a toothpick if necessary.


In a bowl, combine pesto, balsamic vinegar and honey. Mix well and taste; if you think the sauce needs a little more balsamic, feel free to add some. Also, if your vinegar is not as high quality* as it could be, feel free to add a pinch of brown sugar to the mixture as well.

Pan-fry the pancetta wrapped prawns on medium heat. This should finish cooking the pancetta, while allowing the prawns to be cooked, but not overdone.


Once done, remove prawns from pan and arrange on a platter. Drizzle with pesto balsamic glaze and serve.

*High quality balsamic vinegar should have the consistency of syrup and be much sweeter than it’s average counterpart.


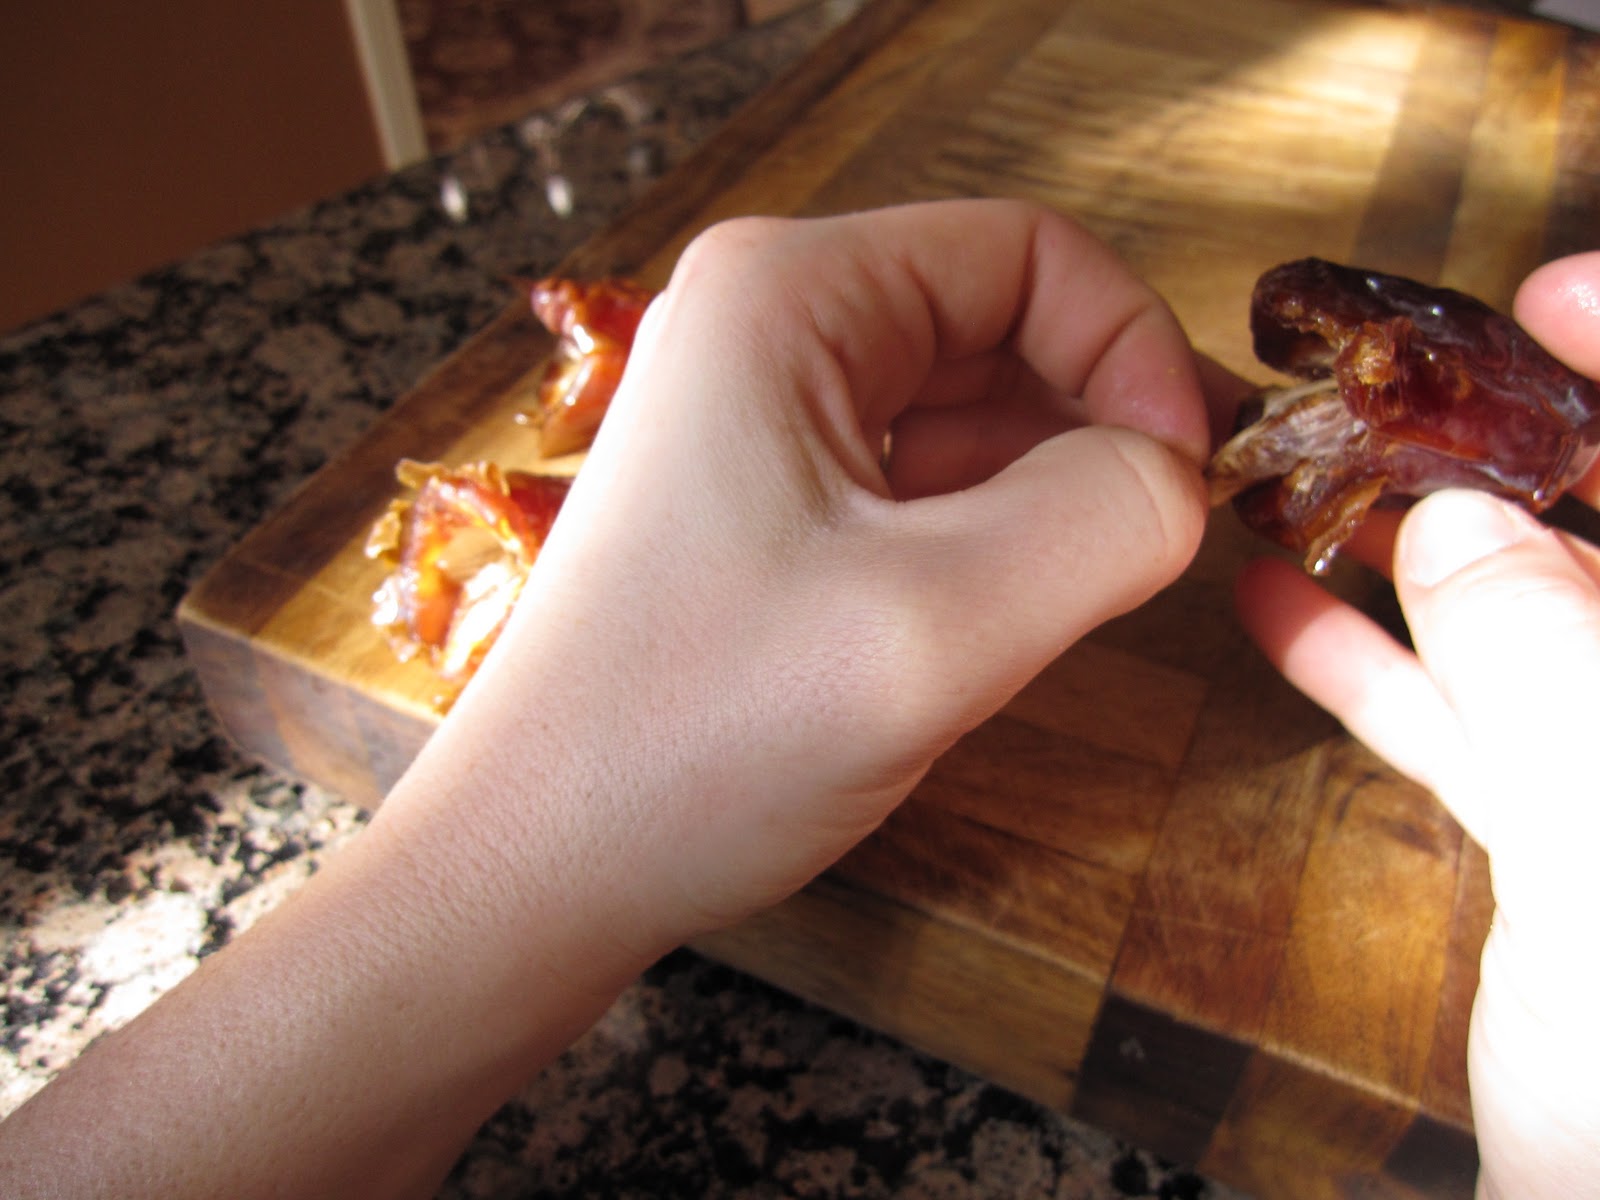
Stuffed Dates, A Few Ways*

Dates with pits removed, but still holding their shape**


A variety of cheeses including Gruyere, Pecorino and Parmesan wedges, and goat cheese
Any nuts including walnut, pecans and almonds, toasted, candied or seasoned
Prosciutto if desired

There are two different ways to go about making this recipe: one can be served at room temperature; the other is broiled in the oven.


Place a wedge of cheese or a smear (depending on what type) in center of date. Place nut within date as well. For the room temperature version of this dish, you are done.

For the hot version, wrap a piece of prosciutto around the stuffed date. Continue with other dates. Place on a foiled lined pan and broil in a 400 degree oven for 5 to 7 minutes. Keep an eye on them as prosciutto is thin and will scorch easily! Serve immediately.

*Don’t be afraid of the date; it’s no longer just for your grandparents and their glory days! They are seriously one of nature’s candies, and can be balanced with a variety of options.
**It’s better to buy dates with the pits, and remove them yourself.


Sage, Pear and Blue Cheese Crostini

3 pears, diced (Bosc or D’Anjou varieties are good)
1 and ½ Tablespoons minced sage
1 Tablespoon butter
1 teaspoon brown sugar
Crumbled blue cheese
Sourdough or French Baguette, thinly sliced
Olive oil
Salt and Pepper to taste

In a pan, melt butter. Add pears and sage and stir well. Once pears start to cook, sprinkle with brown sugar and combine well. Cook for approximately 7 to 9 minutes on low heat. Put pear mixture in mesh stainer over a bowl or sink to allow the excess liquid to drain.


Meanwhile (or beforehand), arrange baguette slices on a pan lined with parchment paper. Drizzle or brush on olive oil and sprinkle with a little salt. Bake in a 400 degree oven, close to the heat source, for about 7 minutes.


Arrange crostini on a platter. Top bread slices with pear/sage mixture, then with blue cheese. Grind a little pepper over the hors d’oeuvres if desired.


To make this ahead of time, create the pear/sage mixture and the crostini a day ahead of time. Save the crostini in a ziplocked plastic bag and the pear/sage mixture in the refrigerator. Remove the mixture from the fridge about 3 hours before the party. Thirty minutes before guests arrive assemble and set out.

My mom, Sue, enjoying a bite.

1 pound of shelled, uncooked large prawns
½ pound of thinly sliced pancetta
4 heaping tablespoons of homemade or store bought pesto
1 Tablespoon quality balsamic vinegar
½ teaspoon honey
Salt and pepper to taste

Tuesday, October 26, 2010

Spooktacular Pumpkin Enchiladas

It's a funny thing, Halloween. For one night you get to don a costume and make believe you are someone else, being unrecognizable to even your best of friends. You hollow out gourds and carve funny faces in their skin, illuminating them on the porch for the world to see. It's especially fun when you are a kid, and you go knocking on strangers' doors begging for a year's worth of sweets and treats in a single night, reciting the same weird phrase over and over again. When you think about it, it sounds like a completely bizarre and morbid holiday. Perhaps that is why my dad has never liked Halloween. On the other hand, it is my mom's favorite holiday and I have most certainly taken after her. 

From left to right, the pumpkins Alyson and I carved last night!

Growing up this was absolutely the best holiday to me (right after Christmas, which goes without saying is most kids' #1). While my mom stayed home and passed out candy, my dad would join the troop of neighborhood fathers who walked us around the neighborhood. To make the experience more enjoyable for everyone, we took the unconventional route and went house to house on a golf cart decked out in Halloween decorations. There was always a cauldron in the back of the cart that touted both juice boxes for the kids and brews for the dads. For one night we became the popular posse in the neighborhood. In short... it was awesome. My mom did all the hard work in the background, slaving over our costumes every year (usually the night before) ensuring they were always the most creative and pretty. I've been a devil (twice), a gypsy, Marilyn Monroe, a pirate, Maid Marian (Robin Hood's fair lady), a ballerina, a Siamese twin with my best friend.... the list goes on and on.


This must be why I had a very difficult time thinking of what to be for Halloween this year. I'm afraid I have almost reached my quota of costumes. Although I loved the holiday as a kid (for different reasons), some of my best years for Halloween were in college. My favorite night of all happened completely haphazardly. It was a week night and no one had any costumes prepared for the evening's festivities. In the sum of an hour we came up with our favorite costumes of all time: a pumpkin, Fantasia, the Mad Hatter, and Puss in Boots.


It is common knowledge to most that Elizabeth and I have many token traits in common: we like to cook, we enjoy shopping for clothes we can't afford, and we love laughing at the hilarity that is Scott Sutherland. But what most people don't know is the second layer of similarities we share: Did you know that we share the middle name Hall? Or that we were both bunches of grapes for Halloween as children? It is connections like these that prove we are in each others' lives for a reason, and it was destined that we create a blog to share our love of food with all of you. However, we do have our differences: there is one thing I love about fall that E is weary of... and that is pumpkin. She enjoys a savory squash dish, but when it comes to adding sweetness to the gourd, she shies away.


To appease both Elizabeth and myself, I am featuring a savory pumpkin dish this week. For every holiday, I have a favorite food and when it comes to Halloween, it seems only fitting that pumpkin enchiladas are the main stay.  For best results, serve with homemade refried beans and Brett's Salsamole recipe. As a special treat, I have also included my favorite spice mixture to roast the pumpkin seeds you carve out of your pumpkin.


Happy Halloween!

Lindsay

 
Pumpkin Enchiladas
Adapted from Martha Stewart's Everyday Food


1/2 leftover rotisserie chicken, skin removed, meat shredded
6 scallions, thinly sliced
Coarse salt and ground pepper
1 can (15 ounces) pumpkin puree*
4 cloves garlic, peeled and coarsely chopped
1 jalapeno chile, ribs and seeds removed and coarsely chopped
1/2 teaspoon chili powder
8 corn tortillas (6-inch)
2 cups grated sharp white cheddar cheese (8 ounces)

Preheat oven to 425 degrees. In a medium bowl, combine chicken and scallions. Season generously with salt and pepper; set aside.


In a blender, puree pumpkin, garlic, jalapeno, chili powder, 2 1/2 cups water, 2 teaspoons salt, and 1/4 teaspoon pepper until smooth (hold top firmly as blender will be quite full). Pour 1 cup of sauce in the bottom of an 8-inch square (or other shallow 2-quart) baking dish.


Lay tortillas on work surface; mound chicken mixture on half of each tortilla, dividing evenly. Top with a small amount of cheese, about 2 tablespoons. Roll up tortillas; place, seam side down, in baking dish.

Pour remaining sauce on top; sprinkle with cheese. Place dish on a baking sheet; bake until cheese is golden and sauce is bubbling, 25 to 30 minutes. Let cool 5 minutes before serving.

*Use Libby's pure pumpkin for best flavor


Roasted Pumpkin Seeds

Preheat oven to 450 degrees. After extracting the seeds from the pumpkin, clean off any leftover strings of pumpkin and rinse well in a colander. Spread the seeds out in a thin layer on a baking sheet and drizzle lightly with olive oil. One spice at a time, sprinkle cumin, paprika, sea salt, fresh ground pepper, and dry mustard in a light, even layer on the seeds. Top with a few pinches (or more depending on your preferred level of heat) of chili powder. Use your hands to toss and mix the seeds together until evenly coated. Spread out again on the baking sheet and bake until golden brown, about 15 minutes.

Tuesday, October 12, 2010

Goat Cheese and Onion Tartlets


I haven’t always loved to cook, but I have always loved to eat.  In the second grade, my teacher assigned our class a project to describe what we believed was the most beautiful thing in the world. My fellow classmates described their mothers or our country’s purple mountains majesty, illustrated by watercolors and crayons in the shades of the sunset.  Unlike the others, I seized the opportunity and declared my love for food. My project read, “The most beautiful thing I've ever seen is low-fat cottage cheese and pepper.” And I drew an interpretation of the dish to accompany my declaration.

I’ve been into food of all shapes and sizes for as long as I can remember, but relatively recently found the joy of cooking. When I was a little girl, it seemed to be a chore, a task my mom had to force me to help her with—definitely not something I enjoyed until I was on the receiving end of things.


Moving out of the house and living on my own is what ultimately helped me to realize my potential. Sick of the cafeteria at my college, I became curious about the kitchen. One of the first recipes I took ownership of were these delicious goat cheese and onion tartlets.  I found it in a vegetarian cookbook I gave my mom for Christmas one year.  He captures a range of cultures through a vegetarian perspective, delivering breakfast, appetizers, soups, main dishes and desserts.  It is the type of book that has you drooling over every page.  I love eating the tartlets, and what’s more, I love cooking them. They are simple and straight forward, and most importantly, very, very delicious.

I have found these to be a real crowd pleaser—serve them as appetizers in 2-inch squares at holiday parties for the perfect bite, or larger squares as a side to a tossed salad. They are best enjoyed warm, but can be made a day ahead of time.  Prepare the tartlets on the baking sheet and put in the fridge until just before your company arrives. I like these to be more rustic; they do not need to be perfect, so don’t feel the need to trim the edges. As is our motto at Knife and Fork, always make recipes your own and play around with them.  Brie works well in place of goat cheese, and feel free to try different herb options, such as rosemary or oregano instead of thyme.

Low-fat cottage cheese with pepper is no longer the end-all-be-all for me, but that doesn’t mean I don’t take pleasure in simple things. Whether it be preparing these tartlets paired with a salad tossed with Elizabeth’s dressing or pushing myself to make a flawless soufflé, I am eternally grateful to the cooking gods for luring me in.

Happy eating,

Lindsay


Goat Cheese and Onion Tartlets
Adapted from Easy Vegetarian

4 tablespoons unsalted butter
2 cups of thinly sliced onion, 1 lb.
2 garlic cloves, minced
1 ½  tablespoons fresh thyme leaves, chopped
12 oz. puff pastry dough, thawed if frozen*
8-ounce log of goat cheese
Flour, for dusting
Sea salt and fresh ground black pepper

Preheat oven to 425°F. Put the butter in a skillet, melt over low heat, then add onions, garlic, and thyme. Sauté gently for 20-25 minutes, until softened and golden. Season with salt and pepper and let cool.


Put the pastry dough on a lightly floured surface and roll out to form a rectangle, roughly 8 x 16 inches, trimming the edges.  Cut the rectangle in half lengthwise (hotdog, for those of you who relate better to that terminology) and into 4 crosswise, making about eight 4-inch squares.


Divide the onion mixture between the squares, spreading it over the top and leaving a thin border around the edges. Cut cheese into eight slices and arrange in the center of each square.

Transfer squares to a large baking sheet lightly oiled or lined with parchment paper, and bake for 12-15 minutes, until dough has risen and the cheese is golden. Let cool a little and serve warm.

Wednesday, September 1, 2010

A Quickie, But A Goody


I really tend to dig into my recipes when preparing for a dinner party or food gathering.  According to my mother’s wisdom, this makes no sense.  She has always encouraged me to cook recipes that I know and am comfortable when cooking for a group. I think it has something to do with the fact that I still have just begun my adventures in cooking and eating, and have an insatiable hunger to try new dishes and techniques.  I have a stack of hundreds of recipes I am dying to try, but don’t have the money or time to do it!


It was for my now sister-in-law’s wedding shower that I prepared this walnut and red pepper dip as an accompaniment to my homemade hummus for crudités.  Thinking that the hummus would assume popularity, I was surprised to find that everyone seemed to love the red pepper dip overwhelmingly!  I had no less than two handfuls of people approach me after the shower inquiring about the recipe.  Unfortunately, I could not claim it as my own, but was of course happy to share.

It is for this reason that I think it deserves a little Knife and Fork time.  Serve it with veggies, pita chips or bread and use the leftovers as a delicious spread on sandwiches.  It only takes a couple minutes and a few ingredients.  For those of you who steer clear of trying new recipes: don’t!  You never know what you will find…

Happy Eating,

Lindsay


Walnut Red Pepper Dip
From Sunset Magazine

2 cups shelled walnuts
½ teaspoon each: ground cumin, sugar, and salt
1 jar (12-oz.) roasted red peppers, drained
1 garlic clove, minced
2 tablespoons olive oil
2 teaspoon lemon juice

In a food processor*, pulse walnuts, cumin, sugar, and salt until walnuts are finely ground.  Add peppers, garlic, olive oil, and lemon juice.  Whirl until smooth.

*You can use a blender if you do not have a food processor; however, you need to chop the walnuts and peppers a bit before blending.

Tuesday, August 24, 2010

For Valaree

Well, the latter half of the month of July and the first half of August came and went, and nary a post was to be had. Thank goodness for Lindsay breaking our dry spell and posting last week about ribs; now, we’re out of excuses.

But while I’m on the topic of excuses, allow me to share mine. My friend Sally put it perfectly when she said this summer I’m currently living my own version of Four Weddings and a Funeral, although, to be frank, if I could give it my own title it would be Six Weddings and a Non-traditional Memorial Service. Kyle and I were the first to get married in our group of friends, and last year ours was the only one we attended. 


The Sutherlands


A few months after we said “I do,” our friends started dropping off the singles scene quicker than a pack of summer bees dipping too close to a pool and ultimately falling in. And here we are. Over the last three months, we’ve been up and down the state of California, with each celebration unique in its own way, and differing from others in ways greater than the fact that there was a new bride and groom each time. A mini-montage of photos devoted to each couple seemed appropriate:


The Brewers

The Barcelonas

The Piersons

The McNeices

(Yes, I realize this is only 4 weddings... There are still 2 to come!)

Sadly though, it’s not the weddings I plan on speaking of today, although they were all lovely in their own right. My best friend’s mom, Valaree, died on July 9th unexpectedly, and I felt it only appropriate to devote a post to her. Why? This woman lived for cooking, eating and feeding as much as I do, and dare I say I owe a bit of my personal zest to her?

The thing I love about food, and I realize I’ve mentioned this before, is that it has an uncanny way of bringing people together. Food truly is about family and life and love because it nourishes. Valaree had a natural way in the kitchen, and she was one of the first people to demonstrate to me that going the extra mile, whether it be with ingredients, prep work or time needed to prepare a delicious feast, really does make all the difference. If you cook with love, your food is going to taste better. It’s common sense, really.

Honestly, there were many specialties I would gladly race over to her house for, and I could talk about her Caesar salad or her Greek shrimp and rigatoni (probably for hours), but it’s her salsa I feel obliged to share.


Valaree knew how much I loved her tacos and always extended an invitation to me if she was whipping up a batch. Brittany (my best friend) would call me up, and about 20 minutes later, I would arrive at their house panting and drooling with pupils dilated. The tacos themselves were pretty basic aside from the salsa, which itself is simple being made up of only five ingredients. One of the ingredients, however, was secret, and I like to think that Val would be ok with me sharing it with you today: it was beer. Dark Mexican beer, actually.


The beer has a way of not only infusing itself into the flavor of the rest, but also highlighting each ingredient on its own. I would be lying if I said I couldn’t polish off an entire bowl of this stuff. In one sitting. With just a spoon and a smile.

The salsa always tasted better in the summertime because, well, tomatoes are in season. Thus, I felt it only right to spend a ridiculous amount of money on some amazing heirloom tomatoes to honor Valaree and her dish. I would like to mention I would not have spent $9 on them (to my husband, if you’re reading this, I’m sorry… Yes, I realize we’re on a budget!), but we live in an apartment and are not able to grow our own.


These tomatoes made me groan with delight and they made it my best batch of her salsa yet (I say my best batch because I’ve never been able to make it taste quite as good as she could).

So please, celebrate one of the best fruits of summer and the life of a passionate woman all at once. Think of Valaree, make some salsa and have a taco. I’m sure she’d want you to.


Happy Eating,

Elizabeth

Valaree’s Salsa

10 roma tomatoes, chopped (any tomato will do if amount is comparable)
½ cup cilantro, chopped
1/3 cup dark Mexican beer (Dos Equis is delicious, but Negro Modelo is good also)
¼ teaspoon sugar
½ cup red onion, chopped
Juice of one lime
Salt to taste

Combine all ingredients. Let sit it in the fridge for a couple of hours to really help the flavors blend.


Valaree’s tacos

Corn tortillas, fried until crispy
Ground beef cooked with garlic and a little salt and pepper
Valaree’s salsa
Guacamole (to make guacamole, combine mashed avocado, pressed garlic and salsa)
Shredded cheese (cheddar and jack are excellent)
Shredded lettuce
Ketchup

Assemble tacos with tortilla on bottom and other fixings inside. Top with a couple dabs of ketchup.*


* Really? Ketchup? Yes, really. It sounds disgusting, I agree with you, but it adds just a hint of sweetness and is scrumptious. I cannot vouch for the fact with all tacos, however.


My well-used copy of the recipe Valaree once wrote for me.


Thursday, April 22, 2010

Potstickers

My heritage is pretty much as Western European as it gets.  If my blonde hair and blue eyes don’t give away my Scandinavian and Hessian roots, my translucent white skin is sure to do the trick.  On numerous occasions, I’ve been stopped by European immigrants, who are all convinced they’ve picked out one of the citizens of their homeland.  In high school, I reduced a lonely Swedish woman to tears when she realized I was, in fact, very American and would not be able to converse with her in her native tongue.  Last week in Trader Joe’s, a man said to me, with a twinkle in his eye, “You… speak a language different from English, yes? You’re from Europe?”  No, aside from the rudimentary French I picked up in high school, I don’t speak a language other than English. I am a California girl through and through.

Thus, it comes as a shock to most to discover the food often cooked in my home growing up was inspired by the cuisine of Asia.  I like to think that my mother’s interest and mastery of many dishes takes root in my parents’ love story, which I am prepared to share with you…right now.


My parents met in San Francisco in the fall of 1979.  My father was working as an executive director at Rescue Now, an organization that was sending doctors and nurses to refugee camps on the border of Thailand and Cambodia after Pol Pot’s regime had begun to eviscerate the Cambodian population in the late seventies.  He was in charge of selecting the staff that would be sent over, and my mom was one of the nurses attempting to volunteer.  Two weeks before they were set to leave, the organization changed the rules, and my parents could no longer go.  As fate would have it, however, they both traveled to the airport to bid adieu to those that were taking off for the East.  My dad will never forget that my mom looked like Annie Hall, waving to fellow nurses and doctors in a pork-pie hat, rolled up jeans and long socks. While this outfit seems questionable to me at best, apparently it made my dad swoon.  When my mother offered him a ride back into San Francisco, he jumped at the chance.  A whirlwind romance ensued, and a month into their relationship, my father decided he was going to fly over to Thailand on his own dime and look for work; my mother said she would follow.  Upon arrival, my father claims he stowed himself in a Red Cross bus by donning a pair of my mother’s scrubs in order to sneak into one of the camps.  He swears by this detail; she is rather dubious of it.  Either way, a job was secured, a phone call was made, and a marital proposal was put on the table (one which was quickly accepted).  My mom arrived a few weeks later, and three months after offering a ride to a mustached man at the airport, she found herself married and living in a refugee camp.

My parents lived in Thailand for a year before moving back to California, and it’s during this time I like to envision my mother picking up all sorts of wonderful cooking techniques from the women in the village where they were living.  Granted, much of the food I ate growing up was Chinese, but utensils and methods can translate to a variety of cuisines. Her wonton soup, shrimp spring rolls, and rice noodle stir fry recipes are all worth mentioning, but none of these is as satisfying as her potstickers.           


When I set out to write about potstickers, I assumed my mother would share a rich story of not only how she acquired the recipe, but learned the techniques (from a small villager with a cute, little face and a huge heart, no doubt).  I could not have been further from the truth.  “Heck no,” exclaimed my mom, “I got the original recipe from a book I picked up at the Macy’s in Union Square called  ‘Madame Wu’s Art of Chinese Cooking.’ It’s fabulous and manages to teach Americans about Chinese cooking without dumbing down the lessons or flavor.”  My imagination is always getting the better of me.

Over the years, my mom tweaked the recipe to her liking, which is what I’m sharing with you today.  Crisp around the edges, soft on the outside, tender on the inside, these potstickers are delectable, but are only made better by the dipping sauce that goes with them.  The ground pork filling and sauce are both seasoned with hits of garlic, ginger and soy sauce, but the combination truly makes for a simple and satisfying dish. 

Not quite as satisfying as unnecessarily having to read my parents’ love story, though, right?  

Happy Eating,  
Elizabeth

Potstickers

1 pound ground pork (ground turkey makes a great substitute)
2 squeezed cloves of garlic
(use a garlic press)
1 square inch of fresh pressed ginger (use a garlic press)

1 teaspoon soy sauce

Vegetable oil

Water
 
Gyoza/Potsticker wrappers*

Potsticker Sauce (recipe follows)

Mix first four ingredients together until combined.  Take one gyoza wrapper from package, setting on a dry, flat surface.  Place teaspoon of meat filling in center of wrapper. Dip two fingers into a bowl of water and lightly wet the edge of half the gyoza wrapper.  Fold dry edge of gyoza wrapper to wet and pinch edges together.  Lightly press the bottom of the dumpling into flat surface so potsticker can stand up on its own accord. Continue with remaining gyoza, until potstickers are set aside and made.


In a large, nonstick pan**, heat 2 TBSP vegetable oil on medium-high heat.  Place enough potstickers in pan to cover the majority of the bottom, but leave room to flip dumplings. Fry until crispy, flipping to crisp other side halfway through (they should be a dark brown color).  Add a cup of water and quickly cover pan with lid or foil.  Allow to steam for 10 minutes. Remove lid and allow excess water to evaporate before placing on plate.

If you're looking for a crispier outside on the potsticker, boil them first, for about 5 minutes, then fry them in oil to get a crispy, brown outside.


Potstickers taste best if eaten immediately, but can be kept warm in the oven. Dip them in potsticker sauce and enjoy!

Potsticker Sauce

2 tablespoons red wine vinegar

6 tablespoons soy sauce

2 teaspoons sugar

1 tablespoon fresh ginger, minced

2 cloves garlic, minced


Combine ingredients. Taste ahead of time and doctor to your liking. Serve with potstickers. Devour.


* Gyoza/potsticker wrappers can be found in most grocery stores, in the refrigerated, ethnic foods section. Please note that gyoza/potsticker and wonton wrappers are not the same thing (even though they look very similar), and this recipe does work best with gyoza wrappers. I tried to prove my mom wrong by using wonton wrappers one time; I was not successful.

** I know.  I hate nonstick, too. However, it makes a huge difference in keeping the potstickers from sticking to the pan and tearing the wrapper.  Another Mama Sue tip I've tried to dispel and failed miserably in the process.

*** Fast variations:  You may have seen bags of frozen prepared potstickers at your local store (my favorites are Trader Joe’s version, but theirs don’t even come close in tastiness).  If you want an easy go-to potsticker, simply make them, place them on a baking sheet in rows (make sure they are not touching; see above image), and freeze!   Once frozen, put them in a gallon size freezer bag and they’re there to fry at your leisure.  Also, these dumplings make a great wonton soup.  Make a simple broth of chicken stock, a little sesame oil and scallions, toss in the potstickers, allow them to cook for about 10-15 minutes, and voila! A hearty and satisfying soup in minutes.
Related Posts Plugin for WordPress, Blogger...