Thursday, March 24, 2011

What Grammy Left Behind

Allow me to introduce my grandmother, Virginia Mae Hall.


She was a special woman who affected my life profoundly in a number of ways, and I know there are many out there who would say the same. She died about six years ago this March, and every year as the morose date approaches, I experience the same emotion. It’s not sadness or anxiety or longing, although those feelings still strike me at random times- driving in the car, doing the dishes, reading a book before bed. No, it’s a feeling of complete and total gratitude for having had her in my life that wraps itself around me every March 2nd.

People who have been lucky like I have understand what makes a wonderful grandparent. Yes, spoiling is usually a part of it, not necessarily in money or things, but in time, patience, stories and laughter. The feeling I most associate with her is an overwhelming one of love and acceptance. She had an amazing outlook on life, and even when things got dark or depressing, she managed to find something to laugh about.

I will never forget that about her.

Grammy is the person who planted the seed for my love of baking and ultimately cooking. Though I’ve mentioned it before (and I’m sure I’ll mention it again), my family spent our summers and winter breaks with my grandparents at their home in Calistoga every year. I looked forward to the treats she whipped up for us, and eventually became interested enough to help her make them. Seven layer bars, chocolate chip cookies, apple crisp… All made her kitchen and home smell amazing, and few desserts survived the next day.


Sometimes when I stumble across the recipe for an amazing sweet piece of decadence, I like to imagine Grammy being the one who led me to it. The brownie recipe below was discovered in Bon Appetit’s February issue and was baked for my best friend’s birthday at the beginning of March. I know my grandmother would approve of its fudgy middle and slightly crackly top, and she would certainly endorse the use of treats to enhance any celebration.

That’s another thing I loved about her, but truly… it’s only one in a list of a million.


Happy eating,

Elizabeth

Cocoa Brownies with Browned Butter and Walnuts

Nonstick vegetable oil spray
10 Tablespoons unsalted butter, cut into 1-inch pieces
1 ¼ cups sugar
¾ cups natural unsweetened cocoa powder (spooned into cup to measure, then leveled)
2 teaspoons water
1 teaspoon vanilla extract
¼ teaspoon salt
2 large eggs, chilled
1/3 cup plus 1 Tablespoon unbleached all purpose flour
1 cup walnut pieces

Position rack in bottom third of oven; preheat to 325 degrees Fahrenheit. Line 8x8x2 inch metal baking pan with foil, pressing foil firmly against pan sides and leaving 2 inch overhamg. Coat foil with nonstick spray.

Melt butter in medium saucepan over medium heat. Continue cooking until butter stops foaming and browned bits form at bottom of pan, stirring often, about 5 minutes. 


Remove from heat; immediately add sugar, cocoa, 2 teaspoons water, vanilla, and ¼ teaspoon (generous) salt. Let cool 5 minutes (mixture will still be hot). Add eggs to hot mixture one at a time, beating vigorously to blend after each addition. When mixture looks thick and shiny, add flour and stir until blended. Beat vigorously 60 strokes. Stir in nuts. Transfer batter to prepared pan.


Bake brownies until toothpick inserted into center comes out almost clean (with a few moist crumbs attached), about 25 minutes. Cool in pan on rack. Using foil overhang, lift brownies from pan. Cut into 4 strips. Cut each strip into 4 brownies.

Tip: I didn’t have a square pan, so I used an 8” round and it worked just fine.

Wednesday, March 2, 2011

Ranger Cookies


These are a scrumptious treat that have been around so long that no one seems to know where they started. I asked my mom where she discovered them and after admitting she had no memory of their origin, referred me to her sister, Auntie Kitty, who said my brother asked for them one day out of the clear blue. Without shock or surprise, he too was clueless.


Through a series of inquiries and interrogations, the story I've pieced together is that Auntie Kitty saw the recipe in the newspaper one day and cut it out, a habit she maintains to this day. According to her, Kyle heard about these "really cool cookies" from his friends on the playground and begged my mom to make the Ranger Cookies one afternoon. 


This was before the convenient days of the internet, so where should one turn to find a recipe they didn't already have? You call Auntie Kitty, Queen of Sweets, who over the years has logged thousands of recipes from various publications. My mom did as all of us do, which led to our introduction to Ranger cookies, a move that hooked us for life.

Between Elizabeth and me, I am definitely not the baker. I find it to be a tedious and laborious process that I usually mess up during the step where you measure the ingredients. I don't like the fact that I can't fix my mistakes the way I can when I am cooking. I have even been known to screw up a pumpkin pie, a crime in the Sutherland clan. Any baking knowledge I have at all I owe to my mom’s side of the family. Every holiday was chock full of any sweet imaginable: 47-layer cakes, pies, Mexican wedding cookies, walnut laden fudge and lollipops to boot!

These cookies are my saving grace. They don't make me sweat, they don't scare or give me anxiety before I take them out of the oven. They are so simple to make, I don’t even bother with an electric mixer. If you choose to mix by hand as well, stir to combine ingredients after each new addition. This will prevent clumps from forming and keep the batter smooth--a trick I learned from my Auntie Kitty. Another tip is that all ovens are different, and things do not always bake according to the specifications of the recipe. Because of this, she advised me to check the cookies 2 minutes before the suggested time. When the cookies are done, their bottoms will be a lovely golden brown color.  

One last thought on the matter: These cookies could almost be called "butter-pecan ice cream cookies". They are studded with pecans and buttery while still being flakey and light. Plus, they have coconut, which happens to be of my favorite foods... of all time! Please, take my word and try these cookies already. 


Ranger cookies are best eaten fresh out of the oven with a tall glass of cold milk.

Happy eating,
Lindsay


Ranger Cookies

1 cup butter, room temperature (2 sticks)
1 cup white granulated sugar
1 cup light brown sugar, loosely packed
1 egg
1 cup oil
1 cup rolled oats
1 cup corn flakes, crushed *
½ cup shredded coconut
½ cup pecans, chopped
1 teaspoon vanilla
3½ cups flour
1 teaspoon baking soda
1 teaspoon salt

Preheat the oven to 350°F.  If you have an electric mixture, use the paddle attachment to make the dough. Otherwise, a regular medium-sized bowl and some good ‘ol fashioned elbow grease will be just fine.

Begin by creaming the butter. Add both the white and brown sugars until light and fluffy. Add in the egg** and oil and mix well. Add oats, corn flakes, coconut, pecans and vanilla. Stir well until ingredients are fully incorporated.


Measure the flour and level with the flat side of a knife; sift onto a cutting board or parchment/wax paper. Working in batches, little by little mix the flour into the wet ingredients. Add salt and baking soda. Mix well.


Form dough into 1-inch balls, taking care that they are uniform so they bake evenly. Place dough balls on an ungreased cookie sheet, 1 ½ to 2 inches apart. Flatten them with a fork dipped into water. Bake for ten minutes, or until cookie bottoms are golden brown.


* I’ve found that the best way to crush corn flakes is by first measuring the cereal, then putting it in a ziplock bag and crushing with your fist or rolling pin.
** As I've watched Ina Garten do time and again... It’s best to crack the egg into a small bowl before adding to the mixture. That way, if you happen to get a bit of shell in, you can fish it out before it gets lost forever.

Monday, February 21, 2011

Humble Mornings


Hi.

It’s us.

Sheepishly peering out from our desktop computers.

In a nutshell, we’ve been working 60-hour weeks and made the huge mistake of putting our favorite blog on the back burner… What were we thinking?!

To cover the long and short of it, here’s what’s happened in the last couple months (really? Months?! Gulp…):

A festive and calorie laden Christmas extravaganza. The ringing in of 2011 (Happy New Year, by the way!). Two family birthdays, a food show and Valentine’s Day.


Yup. That pretty much covers it.

Anywho, while cooking has been less accessible with our hectic schedules, we still have managed to feed ourselves (I’m sure that was never a concern of yours, let’s be honest). And with my early morning hours, I need a pick-me-up at 5am that goes well with my 2 large cups of incredibly dark and caffeinated coffee.  You may have already guessed what I’m about to say.

Homemade granola. With honey, cinnamon and pecans. Sprinkled atop nonfat vanilla yogurt with berries. Holy wow.


There are a few things I love about this morning hero. One, the consistency is phenomenal. I’ve said it before and I’ll say it again: I’m a texture person. Too much crunch or too much mush doesn’t do it for me; I need balance and so do my teeth. Two, when paired with yogurt (granted, in moderate quantities) and berries, you get a breakfast consisting of almost all food groups, enough to make your second grade teacher incredibly proud. And finally, it leaves you feeling full and happy until lunch rolls around. It may even get those with a bad case of the cranks to crack a smile… or at least keep frowning to a minimum.

I like to make a double batch and keep it in a glass jar. It lasts for a couple weeks if you store it in a cool, dry place. But beware of husbands… they’re known to break it out and eat it night and day.

So please accept this recipe as an apology for our slackitude, as well as a toast to the good meals to come in 2011.

Happy Eating,

Elizabeth

Everyday Granola
By Molly Wizenberg of Orangette fame, as printed in Bon Appetit Magazine

3 cups old fashioned oats
1 cup coarsely chopped pecans
½ cup shredded unsweetened coconut
3 Tablespoons packed brown sugar
¾ teaspoon ground cinnamon
½ teaspoon ground ginger
¼ teaspoon salt
½ cup honey*
2 Tablespoons vegetable oil
1 cup assorted dried fruit***

Preheat oven to 300 degrees Fahrenheit. Line a rimmed baking sheet with parchment. Mix first seven ingredients in a large bowl. Stir honey and oil in a small saucepan on medium-low heat until smooth.


Pour honey mixture over oat mixture; toss to coat. Spread on prepared sheet. Bake until golden, stirring every 10 minutes, about 40 minutes**. Place on rack; stir granola and allow to cool. Mix in fruit. Serve.

* Sometimes, I like to switch it up by having it be a quarter cup of honey and a quarter cup of maple syrup. Mmmmm. Maplely.
** I like to bake it for 50 to 60 minutes in order to get a slightly crunchier granola.
*** Cranberries and cherries are great, but honestly, any dried fruit works!
**** Apologies for the lack of photos... I forgot to snap some once the tossing and the coating got going.

Thursday, December 16, 2010

Time to Celebrate

You know who loves a party? Knife and Fork loooooves a party, especially those of the holiday variety.  Thus, it would be appropriate to use too much holiday partying as an excuse for our lack of posting in the month of December.

Sadly, this is not the case. We’re working girls and as is common at the close of a year (is it really almost 2011?), we have been busting our booties with the best of them.

This, of course, should not hamper our readers’ ability to host a kick ass holiday party. Granted, Hanukkah’s over by now, so to our Jewish readers, we extend our most sincere מצטער (that’s sorry in Hebrew, by the way), but for everyone else, there’s still the rest of December to think about. Christmas, New Year’s Eve, both hold much promise in the party circuit, but what to make if you’re planning on hosting?

Pancetta Wrapped Prawns with a Pesto Balsamic Glaze

Not to worry friends: we’ve got you covered.

One of the most important things to think about when you’re planning a get together is preparing as much as you can in advance. Nothing spells “bummer of a party” more than a stressed host or hostess slaving away in the kitchen (I’d be lying if I said this has never before happened to me. The thought of Halloween 2009 still makes me break out in a sweat). By writing out your menu and timeline days in advance, not only will you feel in control, you’ll also have a better time at your own gathering as well.

Stuffed Dates

For holiday party drinks, one can never go wrong with champagne, prosecco or sparkling wine. Served in flutes with a few raspberries, cranberries or a touch of pomegranate syrup merely adds to the festive mood. If hard alcohol’s more your thing, you can always serve up a Dark and Stormy with a holiday twist: add seasonal whole spices like cinnamon sticks, cloves, orange peel and star anise to your simple syrup while heating it on the stove. It will infuse traditional flavor to an already wonderful drink. Eggnog with Maker’s Mark and hot apple cider are also excellent go-to winter beverages, and for the beer drinkers, I’ve been spotting some special ales at Trader Joe’s specifically made for the weeks of December.

Pear, Sage and Blue Cheese Crostini

But what to do about food? Hosting a dinner party is only suggested for those planning on inviting less than eight friends. When it comes to a group of ten or more, go with appetizers, some hot, some cold, some room temperature. This will not only help you in determining how much you can cram in the oven, it will also allow you to have much of it done before your guests arrive. And there’s nothing better than looking like a million bucks with everything ready to go once showtime rolls around.

Below are a few tried and true appetizer recipes we’ve had at some of our own gatherings over the years, and I hope they’ll come in handy over the next few weeks.

To all of you, Happy Christmas, Hanukkah and New Year, and happy eating for the rest of 2010.

See you in 2011,

Elizabeth


Pancetta Wrapped Prawns with a Pesto Balsamic Glaze


Slice pancetta slices in half. Lightly fry pancetta on medium-low heat about halfway (i.e. partially cooked, but allowing it to be malleable and move easily). Once brought to room temperature, wrap pancetta around prawn and secure with a toothpick if necessary.


In a bowl, combine pesto, balsamic vinegar and honey. Mix well and taste; if you think the sauce needs a little more balsamic, feel free to add some. Also, if your vinegar is not as high quality* as it could be, feel free to add a pinch of brown sugar to the mixture as well.

Pan-fry the pancetta wrapped prawns on medium heat. This should finish cooking the pancetta, while allowing the prawns to be cooked, but not overdone.


Once done, remove prawns from pan and arrange on a platter. Drizzle with pesto balsamic glaze and serve.

*High quality balsamic vinegar should have the consistency of syrup and be much sweeter than it’s average counterpart.


Stuffed Dates, A Few Ways*

Dates with pits removed, but still holding their shape**


A variety of cheeses including Gruyere, Pecorino and Parmesan wedges, and goat cheese
Any nuts including walnut, pecans and almonds, toasted, candied or seasoned
Prosciutto if desired

There are two different ways to go about making this recipe: one can be served at room temperature; the other is broiled in the oven.


Place a wedge of cheese or a smear (depending on what type) in center of date. Place nut within date as well. For the room temperature version of this dish, you are done.

For the hot version, wrap a piece of prosciutto around the stuffed date. Continue with other dates. Place on a foiled lined pan and broil in a 400 degree oven for 5 to 7 minutes. Keep an eye on them as prosciutto is thin and will scorch easily! Serve immediately.

*Don’t be afraid of the date; it’s no longer just for your grandparents and their glory days! They are seriously one of nature’s candies, and can be balanced with a variety of options.
**It’s better to buy dates with the pits, and remove them yourself.


Sage, Pear and Blue Cheese Crostini

3 pears, diced (Bosc or D’Anjou varieties are good)
1 and ½ Tablespoons minced sage
1 Tablespoon butter
1 teaspoon brown sugar
Crumbled blue cheese
Sourdough or French Baguette, thinly sliced
Olive oil
Salt and Pepper to taste

In a pan, melt butter. Add pears and sage and stir well. Once pears start to cook, sprinkle with brown sugar and combine well. Cook for approximately 7 to 9 minutes on low heat. Put pear mixture in mesh stainer over a bowl or sink to allow the excess liquid to drain.


Meanwhile (or beforehand), arrange baguette slices on a pan lined with parchment paper. Drizzle or brush on olive oil and sprinkle with a little salt. Bake in a 400 degree oven, close to the heat source, for about 7 minutes.


Arrange crostini on a platter. Top bread slices with pear/sage mixture, then with blue cheese. Grind a little pepper over the hors d’oeuvres if desired.


To make this ahead of time, create the pear/sage mixture and the crostini a day ahead of time. Save the crostini in a ziplocked plastic bag and the pear/sage mixture in the refrigerator. Remove the mixture from the fridge about 3 hours before the party. Thirty minutes before guests arrive assemble and set out.

My mom, Sue, enjoying a bite.

1 pound of shelled, uncooked large prawns
½ pound of thinly sliced pancetta
4 heaping tablespoons of homemade or store bought pesto
1 Tablespoon quality balsamic vinegar
½ teaspoon honey
Salt and pepper to taste

Tuesday, November 23, 2010

Go Stuff Yourself


So… I have much to be thankful for this month. One, a new job after five months of searching finally came my way (sigh of relief!). Two, it is sweater weather… and I’m not talking about “it’s foggy outside and I can trick my body into wearing a sweater” weather. I can actually see my breath in the morning. And the scarves… OH, the scarves! I have flung them out of my closet with flourish and have incorporated them into my daily wardrobe seamlessly. It’s as if the weather gods have tired of messing with me and are finally willing to toss me an appropriate weather bone.

Kyle’s halfway done with school, for the second year in a row we have secured our title as owners of the world’s cutest dog and I have wonderful friends, family and my health.

Does one really need a reason to have a seasonally satisfying and soul nourishing meal with the people they love most? Why shouldn't we chow down heartily to celebrate all that is right with the world?


I meant to post this recipe last week with an explanation about how much I used to hate stuffing. I was going to regale you with a description of my mom’s oyster version (sorry to throw you under the bus, Mom, but what kid likes shellfish next to their mashed potatoes and gravy?), as well as how the two of us came by this recipe from this school when we decided to take a mother/daughter cooking class three years ago. We left in agreement that while the instructor’s “Perfect Mashed Potatoes” were anything but, his stuffing was certainly a crowd pleaser and has made it onto our communal table every year since.

Truthfully, I hoped to make this an outstanding post because, for me, this IS one of the ultimate annual holidays and one of the reasons I am happy to be an American (obviously, not the managing to wipe out an entire race of people with sadistic methods and a European epidemic part). Unfortunately, I’m not infallible and I completely dropped the ball; I think the writing is banal and hastily put together at best. Apparently, when one has a lot to be thankful for, time has an easy and somewhat tricky way of getting away from said person. 

Although, would I have it any other way? I don’t think so.

Happy Thanksgiving (and happy eating),
Elizabeth


Three Bread Stuffing with Apples, Pecans and Sage Sausage

3 cups French or sourdough bread (no baguettes), cubed in one inch pieces
3 cups corn bread, cubed in one inch pieces
3 cups whole wheat bread, cubed in one inch pieces
1 pound sage sausage (Trader Joe’s makes one now!)
1 white or yellow onion, diced
2 Granny Smith apples, peeled, cored and diced
4 stalks of celery, halved and chopped
½ cup Italian flat parsley, freshly chopped
2 cups chicken broth
4 tablespoons (half a stick) of unsalted butter
½ teaspoon dried oregano
½ teaspoon dried thyme
½ teaspoon crumbly, dried sage
3 large eggs, beaten
2 cups pecans, toasted and chopped

Grease a large Pyrex or metal pan with butter; set aside. Preheat oven to 400 degrees.

Combine three different types of bread (or any combination thereof) in a large mixing bowl. In a large pan, cook sage sausage until there is no more pink visible. Pour on top of bread, add apples and pecans and set aside.


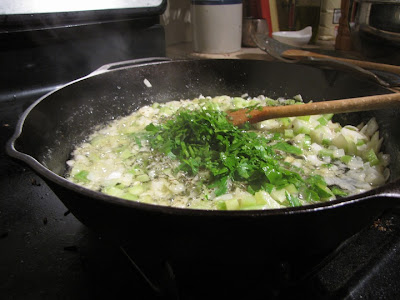
 In the same pan (no need to clean it… the flavor and little meat bits only add to the deliciousness of the stuffing), melt butter on medium heat. Add onions and cook until translucent (about 5 minutes). Add celery and stir for an additional 3-4 minutes. Once that’s done, add the dried oregano, thyme and sage, and chopped parsley; mix well with onions and celery. 


Pour this mixture on top of bread, apples, pecans and sausage. Slowly stir all ingredients in bowl together.

Once done, slowly pour 1 cup chicken broth on top of mixture. Stir well until incorporated, then slowly pour last cup of chicken broth. Pour beaten eggs on top and mix slowly, but well. You want to achieve a consistently moist, but not soggy, mixture.


Pour mixture into greased pan and cover with tinfoil. Put in 400-degree oven for 25 minutes. Remove tinfoil after 25 minutes is up, and let bake for an additional 20 minutes. Serve immediately or keep warm until dinnertime.


Friday, November 12, 2010

Comfort Food 101


This time of year always reminds me of macaroni and cheese.  Some of my earliest memories of the dish are from Halloween, perhaps because it was a special occasion for my brother and me. It was one of the things about the holiday I always looked forward to.  

When you think about comfort food, macaroni and cheese is generally atop most people's lists; it is definitely on the top of mine. I cannot help but order it every time I see it on a menu, if not solely to compare it to the last time I tasted it. This has given me the opportunity to try many varieties, like mac’n’cheese with truffles, as well as a fantastic lobster version (ooo-eee!). Also, it is one of the few things that I could never get sick of; I could eat mac’n’cheese until I felt ill. I believe it is one of the most delicious culinary inventions of all time- have I said enough already?


Surprisingly enough, it is a tricky business to choose the macaroni and cheese recipe that is right for you. I have tried everything from Emeril’s $45 concoction to the $3 boxed Kraft catastrophe. I kept trying recipes, looking for one I loved, and when after months the right one hadn't come along, I had to think back to the roots of the dish. That’s when Paula Dean popped into my head. Her rendition of the classic is simple to execute and has great flavor and creaminess. But best of all, the price is right! As opposed to the über-gourmet recipes that use numerous cheeses, keeping to one keeps the cost down.

I have brought this to a Thanksgiving dinner for 12 people, and I’ve made it for no one but myself. Its irresistibility allows it to fit in anywhere and I have given this recipe to more people than any other in my repertoire. It is my pleasure to share something I feel very strongly about with as many people that care to find out. Most of all, I believe its good for your soul—a true soul food. It leaves you feelings satisfied and warm inside, deeming it the ultimate comfort food.

So if you are looking for something to cook for yourself or your little ones, don't forget about this mac'n'cheesy goodness!

Happy eating,
Lindsay

Mac’n’Cheese
Adapted from Paula Dean's The Lady's Cheesy Mac

2 cups macaroni
2½ cups grated sharp cheddar cheese*
3 eggs, beaten
½ cup sour cream
1 10.75-ounce can condensed cheddar cheese soup
4 tablespoons butter, cut into small pieces
½ teaspoon salt, plus 2 tablespoons for pasta water (optional)
1 cup whole milk
½ teaspoon dry mustard
½ teaspoon pepper
3/4 cup crushed Corn Flakes or Panko

Preheat oven to 350°F. Spray a 13” x 9” glass baking dish with cooking spray. In a large pot, boil 6 cups of water over high heat. Just before adding the macaroni to the pot, add 2 tablespoons of salt to season the water. Add the macaroni and cook so that it has softened but not cooked through, about x-x minutes.** When macaroni is just undercooked, drain into colander.  

When the excess water is drained, return macaroni to pot. Add the eggs, sour cream, soup, butter, salt, milk, mustard and pepper. Stir well and set aside.

Pour macaroni mixture into the baking dish. Sprinkle the crushed Cornflakes or Panko over the top in an even layer.  Bake for 40 minutes, until bubbling and golden brown.

* I use Tillamook extra-sharp cheddar cheese. It can be found at any grocery store and, in terms of flavor, you get the most bang for your buck.
** Cooking pasta so that it is very al dente is very important. Boiling the pasta so that it is fully cooked will produce mushy mac’n’cheese because it cooks more in the oven.  Careful to keep pasta from over-cooking by draining the pasta several minutes before al dente. Then when the pasta is cooked again with the cheese mixture in the oven, it will achieve the perfect noodle texture. 

Tuesday, November 2, 2010

Scorching Soup for the Hot, the Cold and the French


Man, I was so excited to post about this recipe and for more than one reason. First, it’s French onion soup. If you don’t like this dish, I’m sorry… I don’t think we can be friends. Second, it’s autumn and what better way to celebrate than with a hot pot of stock or broth chock-a-block full of veggies, noodles, grains, meat or all of the above, simmering on the stove? 


Of course, in order for a vat of steaming soup to look appealing (let alone the thought of slaving in the kitchen to make it), the weather has to be cold, no? At least chilly, in my opinion.

Thus, it is with a heavy heart I have to mention I’m watching the temperature steadily climb. It’s November 2 (have you voted?), most definitely fall, and a high of 91 is expected today. 91!

C’est absurde! C’est incroyable! (We are talking about French onion soup, after all).

It’s times like these I would have no problem packing the car, throwing in my two honeys (my husband and dog, both against their will) and moving us to the east coast, preferably a city that requires cute sweaters, scarves and boots in the autumn and winter months. The people of these towns, cities and states are begging for soup right now, not popsicles, like we are.

It’s a good thing, then, that I managed to create a batch two weeks ago when not only was it blustery and gray outside, but raining to boot. I had hopes that the last of the Santa Ana winds had paraded their ugly heads for the final time of 2010 in October and that ushering in the holidays with crisp, icy winds would be no problem. One doesn’t tend to want to drink hot apple cider (or buttered rum) when it’s scorching hot.


Moe loves cold, rainy days as well.

But here we are. And back to the most important thing: the soup.

The soup! Ahhh, it is so delicious I am (almost) tempted to close the windows, jack up the A/C and make a batch. Aside from the incredible flavor this recipe bestows upon your taste buds, it is relatively cheap and easy to make.  The only ingredient needed that costs more than $2 is the brandy, and I’m of the opinion that cheap brandy works just as well as the good stuff. It comes from this institution’s book, which will forever hold a special place in my heart as it is where Kyle and I were married last June.

I’ve included the entire recipe, but I should mention instead of serving it in the traditional manner (i.e. with gruyere cheese and bread on top of the soup and baked in the oven), I make cheese toasties and serve them on the side for dipping.

I hope your autumn is a spectacular one and I hope it is filled with bowls and bowls of delectable soup.

I also hope the temperature drops drastically. As soon as possible. But that’s just me.

Happy Eating,

Elizabeth

French Onion Soup
Courtesy of The Culinary Institute of America Cookbook

¼ cup olive oil
4 medium onions, thinly sliced (about 5 cups)
2 garlic cloves, minced (about 1 teaspoon)
½ cup brandy
1 ½ quarts chicken or beef broth (I like a combination of both)*
Sachet of 3 to 4 parsley stems, ½ teaspoon dried thyme and tarragon each and 1 bay leaf, enclosed in a tea ball or cheesecloth pouch
Salt and freshly ground pepper to taste
8 slices French bread
1 cup grated Gruyere cheese

Heat the oil in a soup pot over medium-low heat. Add the onions and cook without stirring until the onions begin to brown on the bottom. Raise the heat to medium, stir, and continue to cook, stirring occasionally, until the onions are deeply caramelized (dark golden brown). The total cooking time will be 30 to 45 minutes**. If the onions begin to scorch, add a few tablespoons of water and continue cooking.


Add the garlic and continue to cook an additional minute. Add the brandy and simmer until the liquid has nearly evaporated, 2 to 3 minutes.

Add the broth and sachet. Bring to a simmer and cook, partially covered for 45 minutes to 1 hour, skimming the surface as necessary and discarding any fat. Remove the sachet and discard. Season with salt and pepper.

When ready to serve,*** preheat the oven to 350 degrees Fahrenheit and bring 2 quarts of water to a boil. Ladle the soup into individual ovenproof soup crocks. Top each crock with a slice of bread and sprinkle with grated cheese, covering the bread completely, and allowing the cheese to touch the edge of the crock.

Set the soup crocks in a baking dish and add enough boiling water to reach 2/3 up the sides of the crocks. Bake until the soup is thoroughly heated and the cheese is lightly browned, 10 to 15 minutes. Serve immediately. Serves eight.

* For a vegetarian version, use vegetable broth.
** Feel free to brown the onions for as long as you want; the longer you brown them, the better depth of flavor you’ll achieve.
*** If you’d like to serve them the way I do, skip the remaining steps and make the delicious Gruyere cheese toasties below!


Elizabeth’s Toasties

Sliced French or sourdough bread
Grated Gruyere cheese

Place bread under broiler and lightly toast one side. Before bread darkens beyond repair, flip it over and pile a decent amount of Gruyere cheese on top. Broil until cheese melts deliciously. Serve immediately with a piping bowl of French onion soup (topped with even more Gruyere cheese, if desired).
Related Posts Plugin for WordPress, Blogger...